
MOT failures often come from really basic faults: blown bulbs, worn wipers, bald tyres, empty screenwash. These are all things you can usually spot yourself in ten minutes on the driveway.
If you sort those bits before test day, you reduce the risk of a fail, save the hassle of retesting, and avoid paying garage prices for easy fixes. For drivers around Fleet, Hampshire, garages like TJ Services see these simple issues causing MOT headaches every day.
Before your MOT, you should check your lights and indicators, tyre tread and pressure, windscreen and wipers, basic brake feel and fluid level, seatbelts and horn, number plates and mirrors, and any leaks. Address problems now rather than letting the tester find them.
Let’s walk through each check simply.
Why Pre MOT Checks Matter?
The MOT tester is not guessing. They follow a clear list set by DVSA. Year after year, the same areas cause most failures: lights, tyres, brakes, suspension and the driver’s view of the road.
The good news is that you can tackle a lot of that from home without tools, ramps or car knowledge. You are not trying to replace the MOT. You are just clearing out obvious faults, so the car has a fair chance when it hits the ramp.
Think of it like revising before an exam. You cannot see every question in advance, but you can avoid losing easy marks.
Before your MOT, you should check your lights and indicators, tyre tread and pressure, windscreen and wipers, basic brake feel and fluid level, seatbelts and horn, number plates and mirrors, and any leaks. Address problems now rather than letting the tester find them when you book your MOT test in Fleet.
1. Check All Lights and Indicators
If you only have time for one check, make it this one. A single dead bulb can ruin the test.
Start by switching the ignition on. Put the light switch to side lights, then dipped beam, then main beam. Each time, get out and walk once around the car. Look at the front, sides and rear. You want to see light where you expect it, with no flickering.
Then turn on the hazard lights and do the same again. All four indicators should flash at a steady speed. If one side flashes much faster, that usually means a failed bulb on that side.
Brake lights are slightly trickier on your own, but still doable. If someone is with you, ask them to press the brake pedal while you stand behind the car. If you are alone, reverse close to a window or garage door, press the pedal and watch the reflection.
While you are there, look at the lenses. Heavy cracks, loose fittings or water sloshing around inside can also be a reason to fail. If you find a bulb out or a lens hanging off, sort it before you head to the test centre. Bulbs are cheap. Fails are not.
2. Look Properly at Your Tyres
Tyres are another common MOT failure, and they are easy to ignore until the tester writes “dangerously worn” on the sheet.
Start with tread depth. If you have a tread gauge, use it in several places across the central part of the tyre. If not, the old 20p test works. Push a 20p coin into a main groove. Look side on. If you can still see the outer band of the coin sticking out, your tread is probably too low or very close to the legal limit.
Do this on all four tyres, not just the front. Do not forget the inner edge. Turn the steering on full lock so you can see inside the front tyres and slide your hand and eyes around the curve at the back.
Next, check the sidewalls. You are looking for bulges, deep cuts, cracks and any sign of the fabric or cords underneath showing through. Anything that looks like a bubble or torn rubber is bad news and needs attention.
Finally, check pressures. Use a home gauge or the airline at a petrol station. The correct figures are usually on a sticker inside the fuel flap or on the driver’s door pillar, as well as in the handbook. Underinflated tyres wear faster and handle poorly. Overinflated tyres grip less. Both can negatively affect your MOT result.
If your tyres are close to bald, swap them before the test. Waiting until the last minute and hoping they pass is a false economy.
3. Inspect Windscreen, Wipers and Washers
A clear view of the road is not optional, and the tester is strict about it.
Stand in front of the car and scan the windscreen for chips and cracks. Then sit in the driver’s seat and check again from that angle, especially the area directly in front of the steering wheel. Small chips on the passenger side may be fine. Bigger chips or cracks in front of you are not.
Next, turn on the ignition, spray the washers and run the wipers. Watch how they sweep. If they leave streaks, miss patches or judder noisily, they are probably worn out. Lift the wiper arms and look at the rubber edge. If it feels hard, split or jagged, do yourself a favour and replace the blades.
Open the bonnet and locate the washer bottle. Top it right up with proper screenwash mixed to the instructions. Plain water is better than nothing, but washer fluid cuts through grime and helps against freezing.
Give the jets one more test. If they barely reach the windscreen or hit in the wrong place, they may be blocked or misaligned. Light blockages can sometimes be cleared with a pin, but if they are completely dead, mention it when you book in.
Sorting chips and wipers now is usually much cheaper than paying for new glass after a fail.
4. Test Basic Brake Feel and Fluid Level
Only a garage can run a proper brake efficiency test, but you can still spot clear warning signs at home.
With the engine off, press the brake pedal a few times. It should firm up and come to a stop well before the floor. If the pedal feels spongy or sinks slowly when you hold pressure, that is not something to ignore.
On a quiet, straight road at low speed, gently brake and pay attention. The car should slow smoothly in a straight line. If it drags sharply left or right, vibrates through the pedal or makes grinding noises, you already know there is an issue.
Back on the driveway, open the bonnet and find the brake fluid reservoir. It is usually near the back of the engine bay on the driver’s side and clearly marked. The fluid should sit between the minimum and maximum marks on the side. If it is very low, that can mean the pads are badly worn or there is a leak. Do not just fill it and forget it. Get a garage to check it properly.
If any of those checks feel wrong, do not wait for the MOT to confirm it. Book the car in for inspection. It is your stopping power at stake.
5. Check Seatbelts and Horn Inside the Car
Cabin safety is easy to forget because you see it every day, but it is still part of the test.
Sit in the driver’s seat and slowly pull the belt all the way out. Run it through your fingers and look for fraying, cuts, burns and heavy wear. If the webbing is badly damaged, that belt may not hold you properly in a crash.
Click the buckle in and tug sharply on the belt to make sure it locks. Press the release button and check it comes free smoothly. Do the same for each front passenger belt and any rear belts.
Then test the horn with a firm push in the centre of the wheel. The sound does not have to be pretty, but it does have to work. A dead horn is a straight fail, and there is no reason to walk into the test with that hanging over you.
These checks take less than a minute, but they keep simple, embarrassing fails off your report.
6. Clean Up Number Plates and Check Mirrors
This is the easy one people skip because it feels too simple.
Start with the plates. Grab a cloth and give both front and rear plates a proper clean so every letter and number is clear. Stand a few metres away. If you struggle to read it, the camera on an ANPR system will too, and so will the tester.
Look for cracks, peeling backgrounds or plates hanging by one screw. Fixings should be tight enough that the plate does not wobble when you tap it.
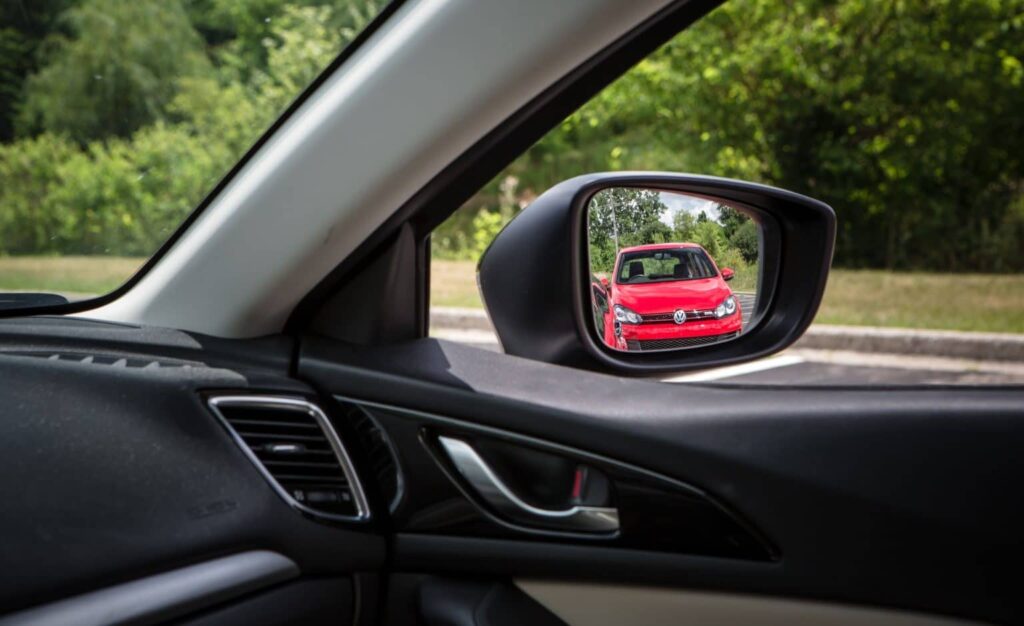
Now walk around the car and check every mirror. Gently push the housings. They should feel solid, not loose or flapping. Look at the glass. A few small scratches normally do not matter, but large cracks or missing chunks do.
Finally, look at your windscreen again and notice what you have stuck to it. Air fresheners, dash cams, sat navs and parking permits all steal a bit of your view. Keep the area directly in front of the driver as clear as possible. If in doubt, move gadgets lower down or closer to the pillars.
7. Look for Leaks and Check Other Fluid Levels
The MOT is not a full engine health check, but heavy leaks can still be picked up as defects.
Park your car in a clean, dry area. Leave it for a while, then move it and look at the ground. A small wet patch in the middle of the car on a hot day may be condensation from the air conditioning. Dark, oily spots, bright-coloured coolant, or any fuel smell are a different story.
Under the bonnet, pull out the engine oil dipstick, wipe it, reinsert it, then pull it out again. The oil level should sit between the marks, not at the very bottom. If it is extremely low, top it up with the correct oil and monitor it. Then check the coolant expansion tank when the engine is cold. The level should again be between the marks, not hiding at the bottom.
If your car has a visible power steering or hydraulic reservoir, check that as well. Consistently low levels in any of these systems indicate that something is escaping. That is the sort of thing you should tell the garage before MOT day.
Independent and fleet-focused workshops, such as TJ Services Fleet, often encourage drivers to report leaks or regular top-ups when booking. It gives the technician a starting point and can turn a small leak into a simple repair rather than a major failure later.
Conclusion
None of these checks replaces a proper MOT. You still need a qualified tester, a ramp, a brake machine and the full DVSA routine.
Your checks help differently. They remove the excuses for failure. They let you fix cheap problems on your terms instead of paying garage rates for the basics. They flag serious issues early so you decide when and how to handle them, rather than being caught off guard in the waiting room.
You do not need to be technical. You just need to be willing to look at your own car for fifteen minutes with the MOT in mind.
Do that each year and MOT day becomes what it should be: a simple confirmation that your car is as safe and legal as you believe it is, not a surprise list of faults you could have spotted from your front door.
For MOTs and servicing in Fleet, visit our garage at TJ Services or get in touch to book your slot.